Are you tired of the all-black attire you wear every time you are on the bike? Well, there is a way you can spice up your overall outlook by adding a few tasteful details to your gears.
Perhaps this guide on how to airbrush motorcycle helmets will be able to help you get started on upgrading your swag! Let’s dive in!
Why Should You Airbrush Your Motorcycle Helmets?

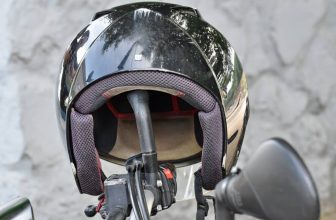
Mark your style with the helmet
Airbrushing, simply put, is a method of applying miniscule paint droplets onto a surface using a can of air pressure gun. The paint drops are almost atomic, so there is no chance of paint dripping or spilling. Specifically, there are many benefits to airbrushing your motorcycle helmets:
- Style: When you get the hang of the technique, you will be able to create your own unique and awesome design! After you airbrush your helmet, we assure you that your gears will stand out from the rest. Airbrushing is also good for helmets with a few cracks and dents since it gives your helmet an even coat that may cover up anything!
- Convenience: Airbrush paints do not drip and cause a mess like how usual paints do. You will have less work cleaning up your working space later. Moreover, airbrush paints dry up very quickly, so you can leave them to dry overnight and wear them on the streets the next morning!
Have we got your attention for this wonderful technique? Then let us get started on the steps to airbrushing your motorcycle helmet!
How To Airbrush Motorcycle Helmets

You will need to take off all the parts aside from the shell
Before you can get to work, you will need to choose your design. A great way to map out your intention is to draw a flat design on paper first. Afterward, you can start to gather these ingredients for the process:
Airbrush Compressor:
An airbrush compressor is a machine that provides your method of painting the air pressure and flows it needs to push paint or ink out. If you want to use the painting method in the long run, be sure to buy a compressor that is up to your standards and your style of working.
Dual Airbrush Gun:
You can always buy a typical airbrush gun, but a dual-type one will allow you to have more leeway while working on your design.
The trigger serves two functions: pulling it down controls the amount of air going through the muzzle, and pulling it back allows the paint to go out with the air. This allows you to have more customization with your strokes!
- Airbrush Paint
- Your reference design
- The suitable stencils (according to your design)
- A roll of masking tape
- Sandpaper
- Primer
- Clearcoat
- An Exacto knife
With all that prepped, let’s get down to business!
Step 1: Disassemble Your Helmet and Sand It Down
Start the process by taking off everything until only the upper shell is available on your table. Every helmet is slightly different in construct, so you will need to understand the model you own to do this step.
If you cannot take off the parts by yourself, you can always look for a disassemble guide online for your particular model!
Once the bare shell is on your table, you should start sanding it with your sandpapers. In detail, this step is to ensure that the surface has enough friction for the atomized paint droplet to stick on.
You can also utilize this chance to sand away the original varnish and the dents/cracks you may have on your helmet!
Step 2: Cleaning helmets
Once you’re done with sanding off all imperfections on the helmet’s surface, you should rinse it under running water to get rid of any remaining dust. Besides, this should prepare your helmet for the next steps of masking and priming!
Step 3: Masking and Priming

Masking tape should let you map out the area you want to paint
Now that all the original varnish is gone and the helmet shell’s surface is smooth and clean, take your masking tape and map out the area you want to paint. Be generous with the tape, as you don’t want other areas to be tainted as well.
You will need to cover up any trims and venting holes. Moreover, if you’re extra careful, you can cover up the cushion inside the helmet as well.
Don’t worry about not being able to get all the paint and stickiness off the helmet afterward! Masking tape is designed to let you peel it off easily later.
Next, generously spray on 2-3 layers of primer on the surface you want to paint!
Step 4: Base Coat and Airbrush Painting
This stage is when the fun starts! Apply your stencils one by one and follow the design you have mapped out beforehand.
The trick to applying an even coat of airbrush paint is to keep all settings at medium while testing and adjust accordingly. If you feel like the paint is a little too cakey for your liking, reduce the paint strength and keep going.
Make sure the lower layer is a bit dry before applying a stencil on top of it; otherwise, the stencil will take away some of the paint while it’s being peeled off!
Step 5: Dragon
You can also try to decorate your helmet with a fancy picture like a dragon design on it! In this case, choose a picture you like on the Internet and print it out. After that, simply place the image on the helmet and spray the image’s edges to make it fixed.
Step 6: Clear Coat and Finish
When the design is as you want it, you can start to apply the clear coat. Moreover, you will want to be generous and have at least seven layers of clear coats on the helmet to have the design stay a little longer.
Try to be patient and wait for each layer to dry for a bit before spraying on a new layer on top, or the coat will just drip all over your working space!
Once everything is settled and done, you can safely remove the masking tape and assemble the helmet parts back on again! After a week, all the paint fumes will be gone, but leaving the helmet to dry air overnight should be enough for casual use!
Outro:
Overall, learning how to airbrush motorcycle helmets is a great way to add your personal touch to your gears. Moreover, you can apply these techniques on so many other things as well, so they can all have your signature look on them. That should be all the information you need to know for the question of “How to airbrush motorcycle helmets?”. Now you can hit the streets with style!
Check the website Motorcycleclick.com for more information about helmets. Thank you for reading.